
See the new features in action in the actual editor.
The narration is in Japanese. Pressing play loads the video from YouTube. Watch on YouTube
Adjust any region later, as many times as you like
Until now, every time you drew a region, you confirmed it with the “Apply” button. A confirmed mosaic was burned into the photo, so if you wanted to change its position or strength later, you had to undo it and apply it again.
From v1.2, there's no need to confirm. Every region you draw stays editable, and just by selecting it again, you can change its position, size, effect type and strength anytime.
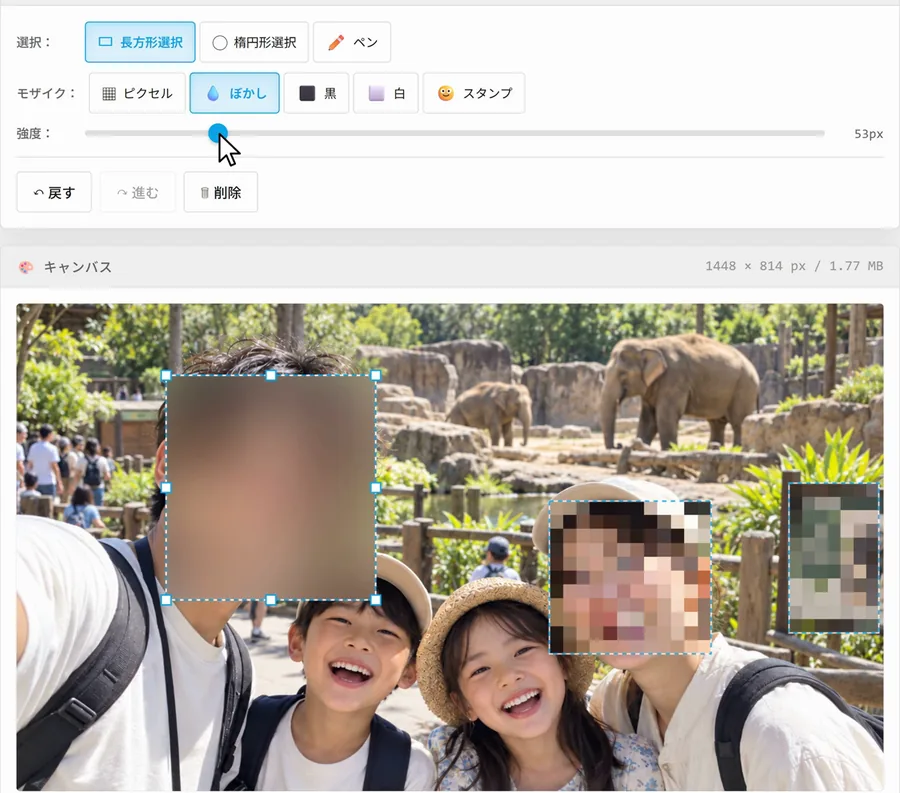
How to use it
- Draw around what you want to hide with “Rectangle,” “Ellipse” or “Pen” (the mosaic is applied as soon as you draw)
- Tap (or click) the region you want to fix to select it. A dotted outline and square handles appear
- Drag inside the region to move it, or drag a handle to resize it
- Change the type with “Effect:” (Pixelate, Blur, Black, White or Stamp) and the strength with “Strength:”
- To remove a region you no longer need, select it and press “🗑 Delete”
The panel settings apply to the selected region. When nothing is selected, they apply to the next region you draw (to the right of the “Tools” heading, you'll see “Target: selected region” or “Target: next region”). Tap an empty spot on the photo to deselect.
Keyboard shortcuts on a computer
| Key | What it does |
|---|---|
| Ctrl+Z | Undo |
| Ctrl+Y | Redo (Ctrl+Shift+Z also works) |
| Delete | Delete the selected region (Backspace also works) |
| Esc | Deselect |
On a Mac, use ⌘ instead of Ctrl.
“Stamp”: hide things with an emoji or your own image
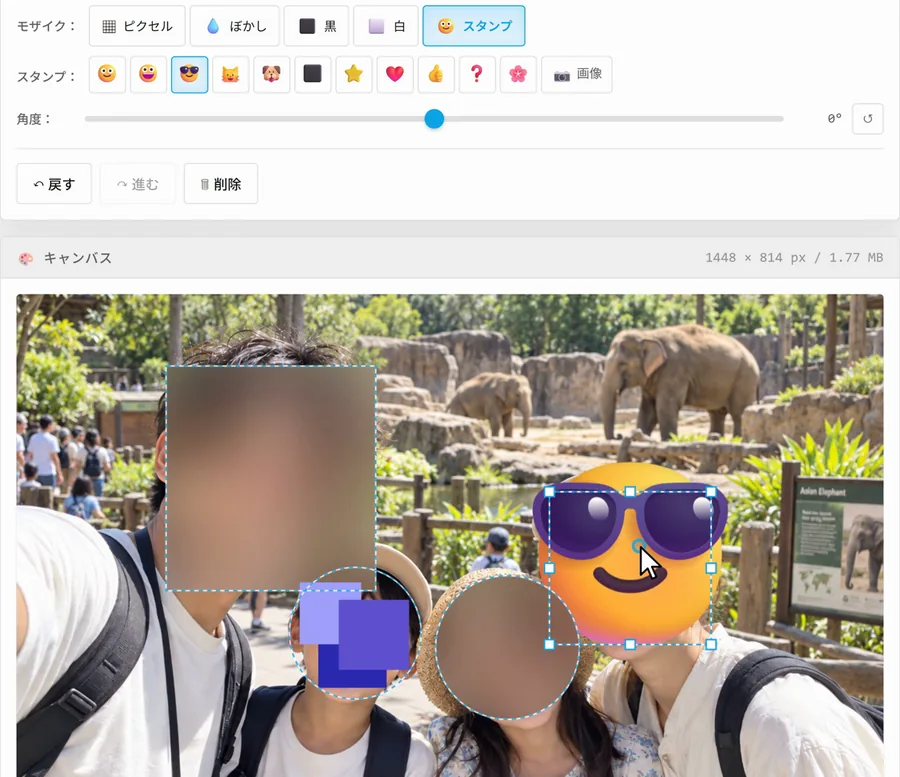
We've added “Stamp” as a new effect type. When you want to hide your child's face before posting a photo on social media, for example, it covers the face without spoiling the mood of the photo the way a mosaic or blur can.
How to use it
- Select the region you want to hide (if you're about to draw a new one, skip this and go to the next step)
- Choose “Stamp” under “Effect:”
- Pick one of the 11 emoji under “Stamp:”. To use your own image instead, press “📷 Image” and choose a picture
- Each region gets its own image: use your logo for one person and a different illustration for another. You can mix them with emoji, too
- The whole image shows, nothing cut off: when you choose an image, the region's box changes to match the image's aspect ratio, so even a wide logo isn't cropped at the edges
- iPhone photos (HEIC) work too: any image Mozaru can open can be used as a stamp as is
Rotate stamps so they blend into the photo
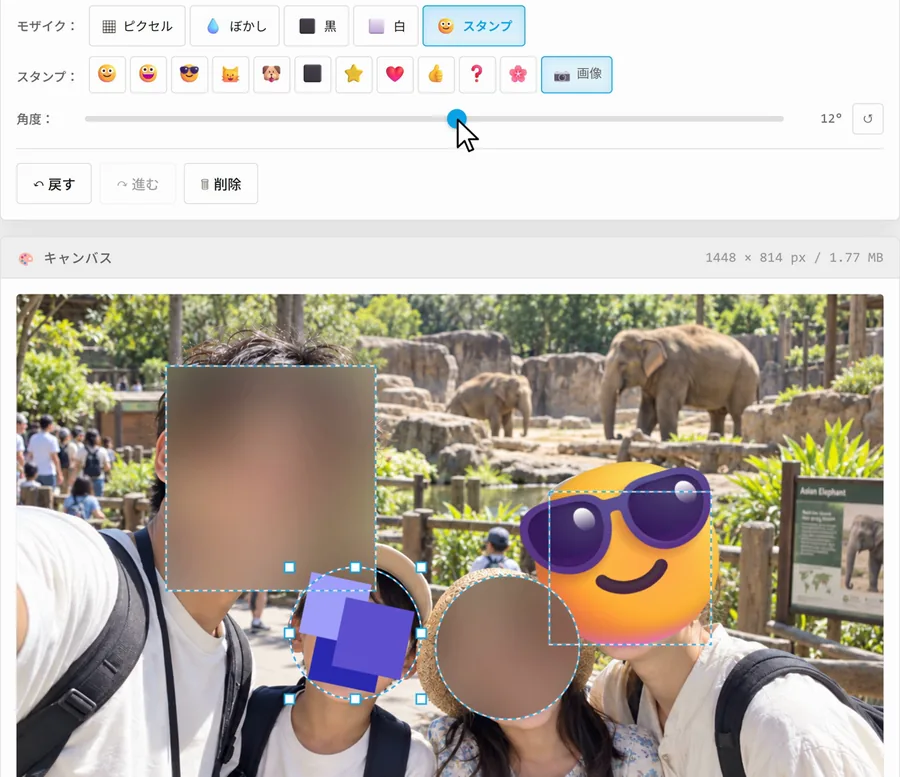
Faces in photos aren't always looking straight at the camera. Since you can rotate stamps, you can line them up naturally with the tilt of each face.
- Use the Angle: slider to rotate anywhere from -180° to 180° (positive is clockwise)
- Press “↺” to go back to 0°
- Each region keeps its own angle, so every person can have a different tilt. Rotating doesn't change the stamp's size
A gentle snap to perfect squares and circles
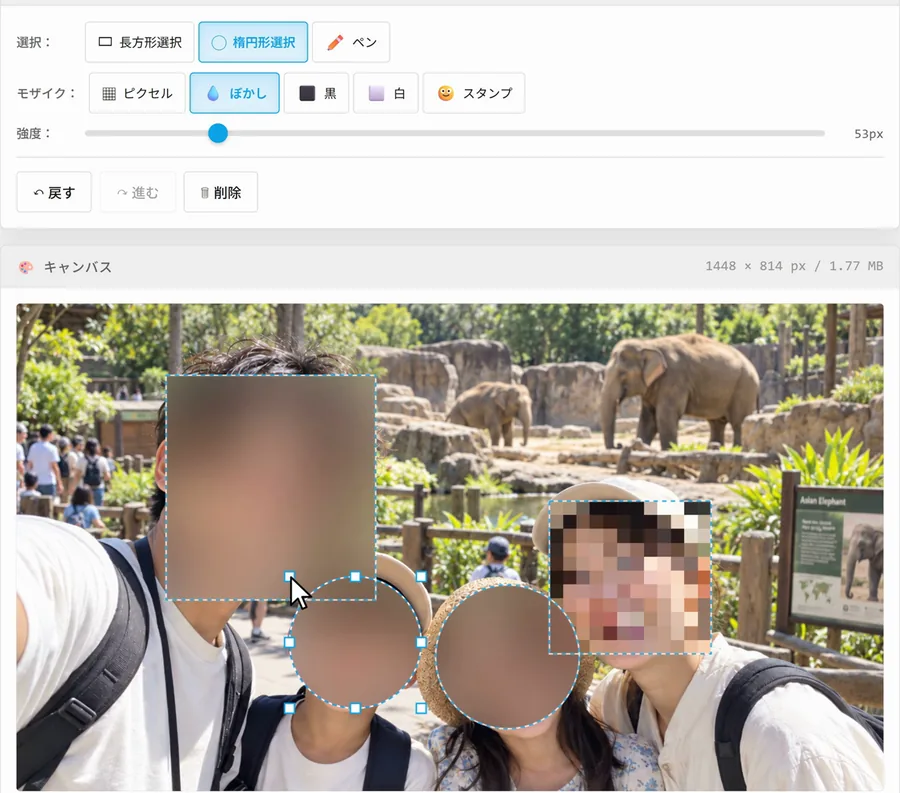
When you draw with “Rectangle” or “Ellipse,” the shape now snaps gently to an exact square or circle as the width and height get close. The same goes for resizing with the handles.
It only snaps when the difference between width and height on screen is tiny (8 pixels or less). Keep dragging and you can still make it as tall or as wide as you like.
Want to blur a video? Try “Tsuibi Mozaru”

Mozaru is for photos and images only. To add a mosaic to a video, try Tsuibi Mozaru, the video version. Just draw a box around a face or anything else, and it automatically follows the movement and keeps it hidden. Emoji and image stamps work there, too.
Open Tsuibi MozaruFAQ
Did the update make it a paid tool?
Do I still need to press “Apply” to confirm each region, like before?
What images can I use as a stamp?
Can I use a different image stamp for each region?
I deleted a region by mistake.
Are my images uploaded to a server?
Found a bug, or want a new feature?
About the author
Try the new Mozaru
Free, no sign-up. Open it and you're on v1.2. Your images are never uploaded.